When you start a system update on your Windows PC, it usually completes without any issue. Moreover, it also does that within a reasonable time. However, due to some issues with your device, it might fail to complete the update.
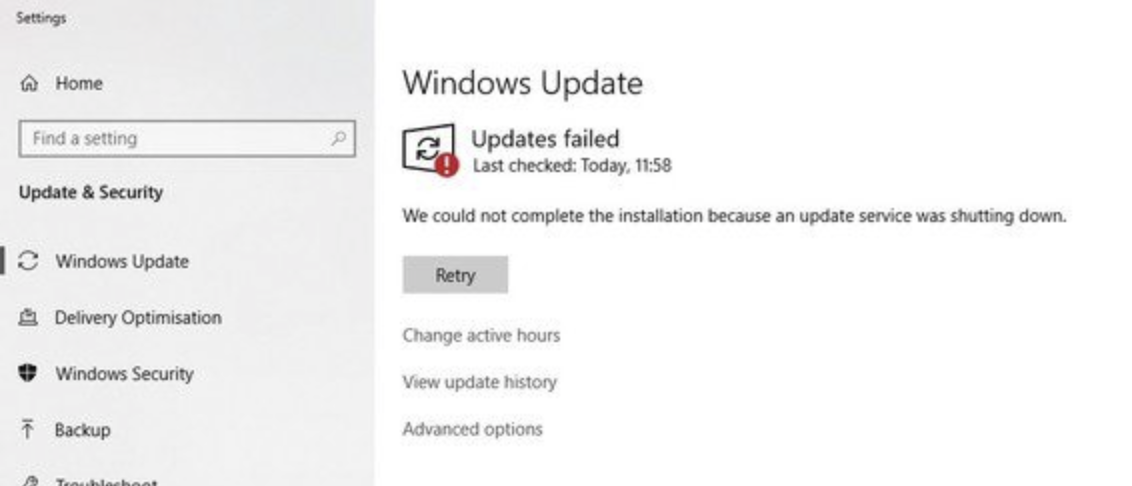
In such cases, you usually get the message “we could not complete the install because an update service was shutting down”. But, it does not specify what causes the issue.
You need not approach a repair center right away to fix this issue. The methods we have mentioned below should help you get an effective solution. So, you might want to try them out before contacting an expert.
7 Effective Ways to Resolve Windows Could not Complete the Update Error
Your device could fail to complete the installation due to multiple reasons. So, you need to consider all the possible explanations for the problem and apply a solution accordingly. The following fixes can resolve this problem in most cases:
-
Check Your Disk Space
You must check the space on your system drive before proceeding with a Windows update. If it does not have enough space, that explains why the system failed to complete the installation.
So, you must remove all unnecessary files from the system drive and then start the update again. Your device should complete the process this time, provided there are no other issues with it.
But, what if you fail to clear enough space by deleting files? Then, you must consider shifting the files to cloud storage. You can store up to a certain volume of data there for free. Apart from providing extra space, cloud storage is also helpful for protecting all your important files.
-
Troubleshoot Windows Update Issues
The troubleshooter can help you identify and fix problems on your device within a short time. Among other things, you can also use it to diagnose and fix update issues. You might want to try this solution before others to save some time.
Go to the Update & Security section in your Settings and open the Troubleshoot tab. Then open the Additional troubleshooters and select Windows Update. Click on “Run the troubleshooter” given below Windows Update to start a scan. The troubleshooter will diagnose any update-related issues and fix them right away.
You might have to wait for some time, depending on the problem. Follow all the on-instructions to complete the process and restart your PC once you are done.
-
Run an Antivirus Scan
Your PC might fail to finish the installation due to viruses and malware. In such cases, you might also face data loss. So, you must find and remove any viruses and malware as soon as possible. Scan your PC with a reliable antivirus program to detect any malicious software in it.
If required, you must look for a better antivirus than the one you have. You will find many options out there that can perfectly suit your requirements. Many of them can offer you a great performance free of any charges. Moreover, you can get access to more advanced features by getting their paid versions.
-
Remove Third-Party Apps Causing Trouble
Third-party apps might often interfere with the system update process on your PC. As a result, you might repeatedly fail to complete the procedure. If the aforementioned methods cannot fix the problem, you must look for troublesome apps on your device. Use the Task Manager to observe your applications, if required to find the culprit.
In many cases, your third-party antivirus program might stop your device from completing the update. Regardless, go to the Programs section in the Control Panel once you find the app causing the issue.
Click on Uninstall a Program and right-click the app to bring up the options. Opt for removing it from your device, and then check the problem.
-
Restart the Windows Update and Related Services
The update process on your Windows PC works due to the Windows Update service running in the background. So, you would not be able to proceed with the update if this service is disabled. If you cannot find any other cause, this issue might indicate an error in the update service.
So, restarting the Windows Update service might fix the issue effectively in many cases. However, that may not be enough, and you might also have to restart other services related to it.
Go to the Services section using the search box and right-click on Windows Update Service. Then, opt for restarting it or stopping it for a few minutes before starting it again. If that does not work, try doing the same with other update-related services.
-
Get the Latest Windows Servicing Stack Update
Get the Windows servicing stack update if your operating system fails to handle the update. But, you must make sure to get the latest version for this purpose. Also, you must choose between 32-bit and 64-bit versions, depending on your system.
Download a servicing stack update from the Windows Update Catalog on the web. Then, install it and run the system update again. This should fix the problem that you faced while completing the Windows updating procedure.
-
Repair System Files
Your Windows system might fail to complete the update due to a damaged system file. In such cases, you must find and repair the affected file before updating your system. You can do that easily using the System File Checker (SFC). You have to use the Command prompt as administrator to use this tool.
Enter “sfc /scannow” when prompted to scan your PC for corrupted files. SFC will start repairing the damaged files after completing the scan. Close the Command Prompt once you are done and try updating your system again.
Bonus Tip: Update Your System with an ISO File
You can also update your Windows system to the latest version with an ISO file. You need to download the Windows Media Creation Tool from Microsoft’s official website to do that. Then, run it on your device and input the options you prefer. Opt for updating the system right now to get the latest Windows version.