Windows 11 introduces many new features to change your PC experience, and most of them are quite useful. Microsoft has also removed several old features from your PC. Thus, many users have complained about the old photo slideshow not being available in Windows 11.
Do you want to get back the photo slideshow feature on your PC? Then, you need not necessarily revert back to Windows 10 for that. Instead, try out the steps given here to get something similar to the old Windows photo slideshow.
7 Ways to Set Up Slideshows on Windows 11
From what it seems, Windows 11 will not bring back the old photo slideshow to your PC. However, that does not mean you cannot set up slideshows anymore. You can use various pre-installed features on Windows 11 or third-party programs for slideshows. So, you have many ways to proceed and must choose the one that suits you best.
- Slideshowing an Album on the Photos App
Microsoft has not completely removed the slideshow feature but has limited its use. So, you cannot get the same customisation on Windows 11 as the older photo slideshows. If that works for you, then you can simply use the Slideshow feature in Photos.
Create a New Album for the Slideshow
Do you want to display photos located in different albums in the slideshow? Then, you must bring them together in a single album first. So, launch the Photos app, go to the Albums tab and click on New Album.
Are you unable to find the images you are looking for in Photos? Then, click on the Import option and select ‘From Folder’ to add an image. Use the Create option after selecting the images and proceed with the next step.
Start the Slideshow
Select the new album you have created to get the Slideshow option at the top. You can then start slide showing the images in the album anytime you want. This method is only suitable when you want to slideshow a specific album.
- Slideshowing Your Collection on the Photos App
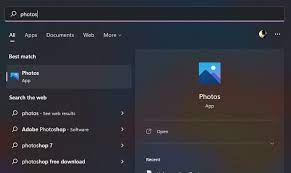
Do you want to slideshow all of the images on your PC? Then, you can use the Photos app for that as well. In this case, you must launch the app and open the Collection tab. Click on the Action icon at the top-right corner and select the Slideshow option. This will begin the slideshow with all images in the Photos app.
You can create slideshows with only a single form and shape with this method. Moreover, you also cannot customise the speed and animation according to your preferences.
- Using Winaero Tweaker
As mentioned above, various apps can bring back the old photo slideshow in Windows 11. However, they are not as effective as Winaero Tweaker when it comes to doing that. This app lets you get all old Windows features that are absent in the latest version. So, it is a must-have if you are dissatisfied with some aspects of Windows 11.
You must download Winaero Tweaker from the official website of this app. It is compatible with Windows 11 as older versions up to Windows 7. You can use it to bring back some customisations discontinued in the latest system version.
Launch the app after installation and turn on ‘Classic Full Context Menus’ and ‘Enable Ribbon’. Then, restart your PC and check whether it has applied the changes. You should then be able to run the old photo slideshow on Windows.
- Get a Third-Party Slideshow App
There are plenty of apps made specifically to run slideshows if you need one. They might provide you with a quick solution when compared with the previous steps. It may lack the features in the Windows 10 slideshow but can still be worthwhile.
You can look for slideshow apps on the app store or get them from their official websites. Check the features they offer before downloading any of them. Install the one that has all the slideshow customisation options you need.
- Using the Windows Media Player
Do you prefer to stick to the features available on Windows 11? Then, you must try out the Windows Media Player to create a slideshow. You must know that this tool is meant to play only music and videos. However, you can add images to it and create something similar to a slideshow.
Create a Folder with the Photos
You must bring the photos you want in your slideshow in the same folder first. So, you might need to create a new folder on your File Manager for this task. Then, select the photos and copy or move them to this newly created folder. You can then view the photos in a slideshow with the next step.
Add the Folder to a Windows Media Player Legacy List
Right-click the folder containing the photos to view the available options for it. Then, click on ‘Add to Windows Media Player Legacy list’ on the menu. The time required for starting the slideshow depends on the size of the folder. So, you might have to wait for some time before the slides appear on the screen.
- Using Google Photos
You can also use Google Photos to create a slideshow with your photos. To do that, you would have to upload the images there first. Also, you need a Google account to apply this method, which you probably have. Open your Google Photos home page on a browser to check the uploaded images.
Create an Album for the Slideshow
Click on the Upload and select Computer if you are yet to save images on Google Photos. Then, opt for creating an album, select the photos and click on Done. You can run a slideshow of the album once you are done.
Run a Slideshow
Select your new Google Photos album and click on the three dots menu. Click on the Slideshow option at the top to start the slideshow. Same as on your PC’s Photos, you do not have any customisation options on Google Photos.
- Using Google Slides
Google has a web app to help you create slideshows with your photos. It can be quite useful now that Windows 11 has removed the old photo slideshow. Moreover, it also allows a wide range of customisations to users.
Open the Google Slides homepage on your browser to start creating your slideshow. Then, select the Go to Slides option, click on Blank and enter a name in the Untitled box. Opt for adding blank slides until you have the number of slides you need.
Select the first blank slide and click on Insert to add an image from your computer. Click on Open after selecting a photo to try it out on the slide. Repeat this process to add images to the other slides. Make all the required customisations and try out the slideshow before downloading the file.
Revert to Windows 10
Getting Windows 10 back is the only option if you are unwilling to apply the aforementioned steps. However, that is possible only if you have updated to Windows 11 less than 10 days back. Clean install Windows 10 on your PC if the option to revert is unavailable.